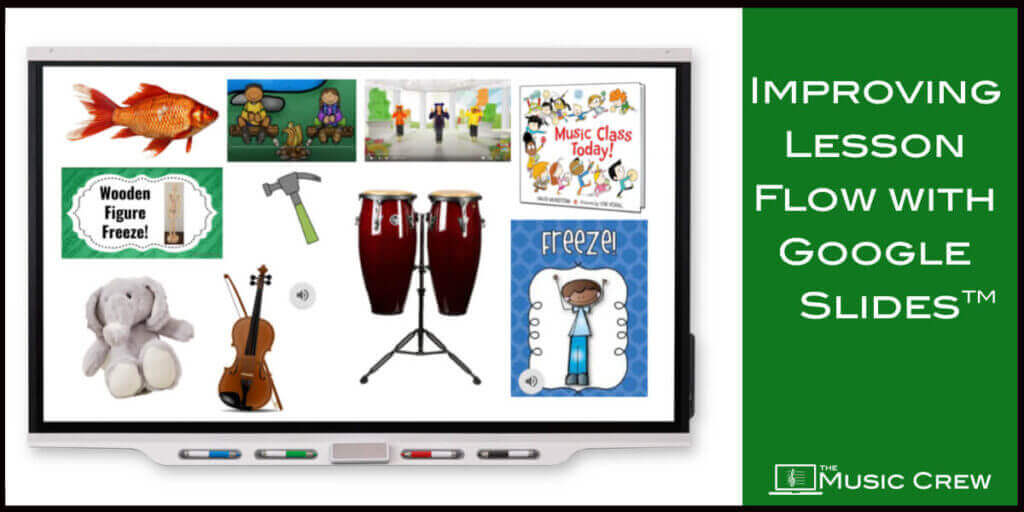
One of the things that I struggle with when teaching the littlest musicians is their short attention spans. I know that they will be most successful if I change activities frequently, but when I’m planning for seven grade levels (K-6) it’s hard for me to remember all of the fun things I have planned for younger students without referring to my lesson plan constantly- which really disturbs the flow of the lesson! I figured there HAD to be a better way- and there is! Creating Google Slides™ presentations to guide my lessons has not only helped me remember everything I have planned, but has also created the opportunity for me to supercharge my classroom management and empower my students to help lead our lessons.
When working with students in grades K-2, it is common that many of them are not strong readers yet. For this reason, I create my lesson slides with pictures instead of text based items. As I plan each activity, I find or create an image to place on the first slide of my presentation. The image can really be anything that relates to the lesson! It could be a screenshot of a video, a clipart image of an item that is mentioned in a song, a picture of an instrument we might be using, a book cover, etc. I try to use a variety of different types of images, and my goal is to make the image inviting and intriguing- not necessarily trying to give my students a real idea of what the activity is all about. The mystery of the images creates excitement for the students, which helps when I begin to use this method of lesson prep for classroom management!
Oftentimes, I have lessons where the order of the activities doesn’t matter to me. There may be a few things that should be presented in a certain sequence, but many items can go in random order. When we are ready to begin our activities for the day, I will present the first slide of the lesson. I tell my students that I will be looking for someone who is making great choices, sitting correctly, etc. to choose which activity we do first. That student will come up and point to (not touch) the SmartBoard to make their choice. Once the student has made their choice, I can give the students any instructions they need before we begin. Sometimes the images will be clickable links to activities, but other times it’s something that I will lead without any technology involved. (If I have a specific order that we need to follow, I just don’t include the student choice option. I can still lead the class from this presentation and it still helps me stay on track!)
If the student chooses an image that is connected to a link, such as a video or an activity with a separate slide to display, I will attach a link to that image that takes us to another slide in the presentation. Linking within the presentation (as opposed to linking to YouTube or another presentation) helps to maintain the flow of the lesson AND (SUPER BONUS) stops the issue of ads popping up all the time!
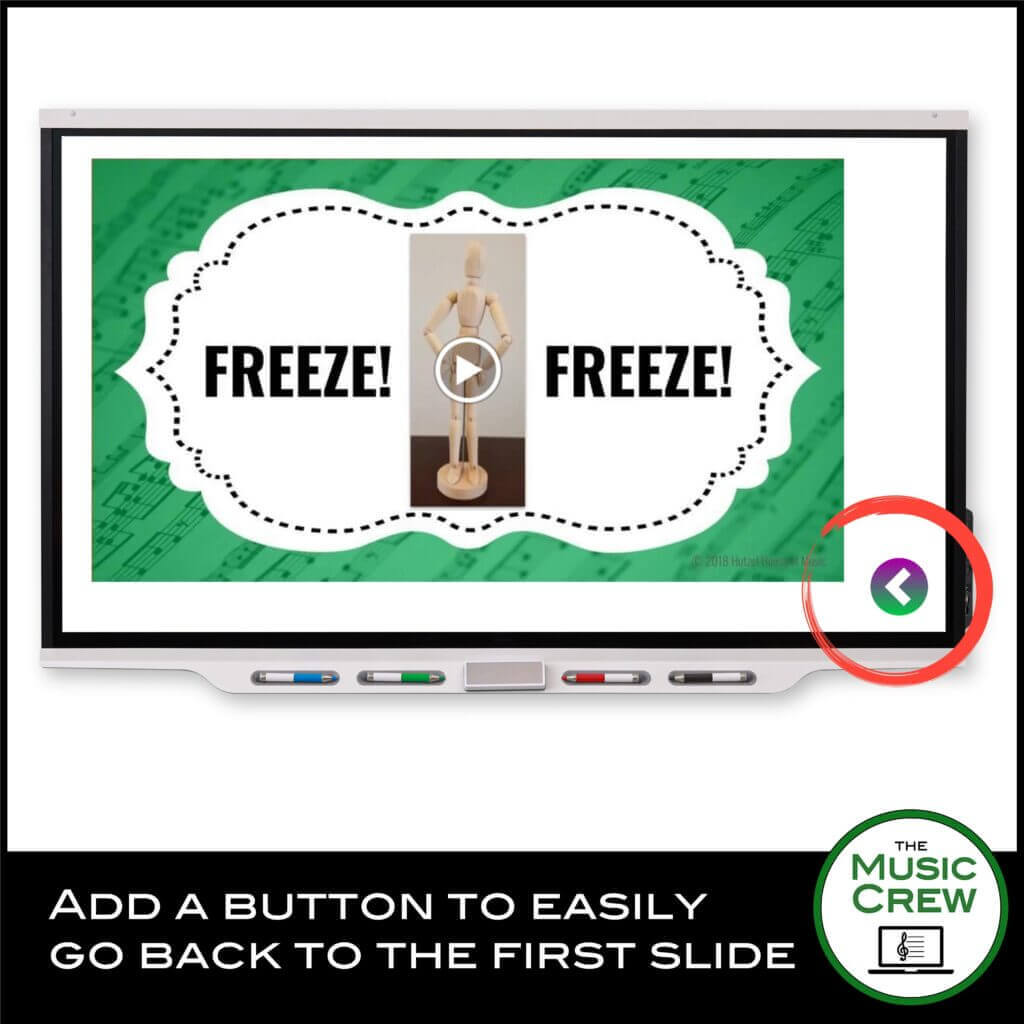
When you create a link from the image on your first page, have it go to a later page in the presentation. On that page, you should embed the material you will use- so if it’s a YouTube link, for example, select Insert → Video → then either paste the link or search for the video you want to add. This will set your slide show up so the video plays right there without going to YouTube, which eliminates the ads! Then just make a little button in the corner that sends you back to the first page of the slideshow where another student who has been giving their best effort can choose the next activity. To do this, add a small image and link it to Slide 1.
If the activity you have planned is one that will be completed without technology assistance, just don’t link that image! For example, I might put a picture of a bumblebee on my screen if we were going to listen to the song Flight of the Bumblebee or play the game Bee Bee Bumblebee. Maybe one day choosing the bee would mean we play the game, and another day it would mean listening to the music! If we were listening to a recording, I might add the audio file to my slides, but sometimes I would choose to play the CD instead. If the item is not linked, students would just tell me which image they choose, and then I would take it from there without tapping the image or moving from the first slide of the presentation.
As we progress through the year, I create new presentations that sometimes use some of the same pictures/links/activities, but always also add new items. Sometimes the same picture will lead to a different activity! Changing things up keeps the students excited and engaged, which helps with classroom management significantly.
I hope this helps you create flow to your lessons, reduce your memory fatigue, and assists you with classroom management while offering students “voice and choice” in their music class activities. If you have questions, I am always happy to help! Leave a comment here or send me an email.
Musically,
Chrissy Hutzel
Hutzel House of Music









Thank you! This was helpful!